
MODULAR GUN BELT ASSEMBLY
These instructions outline the assembly process for your Modular Gun Belt. For shipping and packaging efficiency, the belt is delivered in a disassembled configuration and will require assembly upon receipt. The process is straightforward and only requires a screwdriver with a #2 Phillips bit. Please follow the steps below to ensure proper and secure assembly.
COMPONENTS
When you receive your belt, please inspect all the components required for assembly. Each package should include the following:
Belt Body (Pictured Below)
1” Cobra Buckle
3x Double Binding Posts
6x Truss Head Screws
Screw Plates
Buckle Attachment
Hook & Loop Strap Keeper
Belt Strap
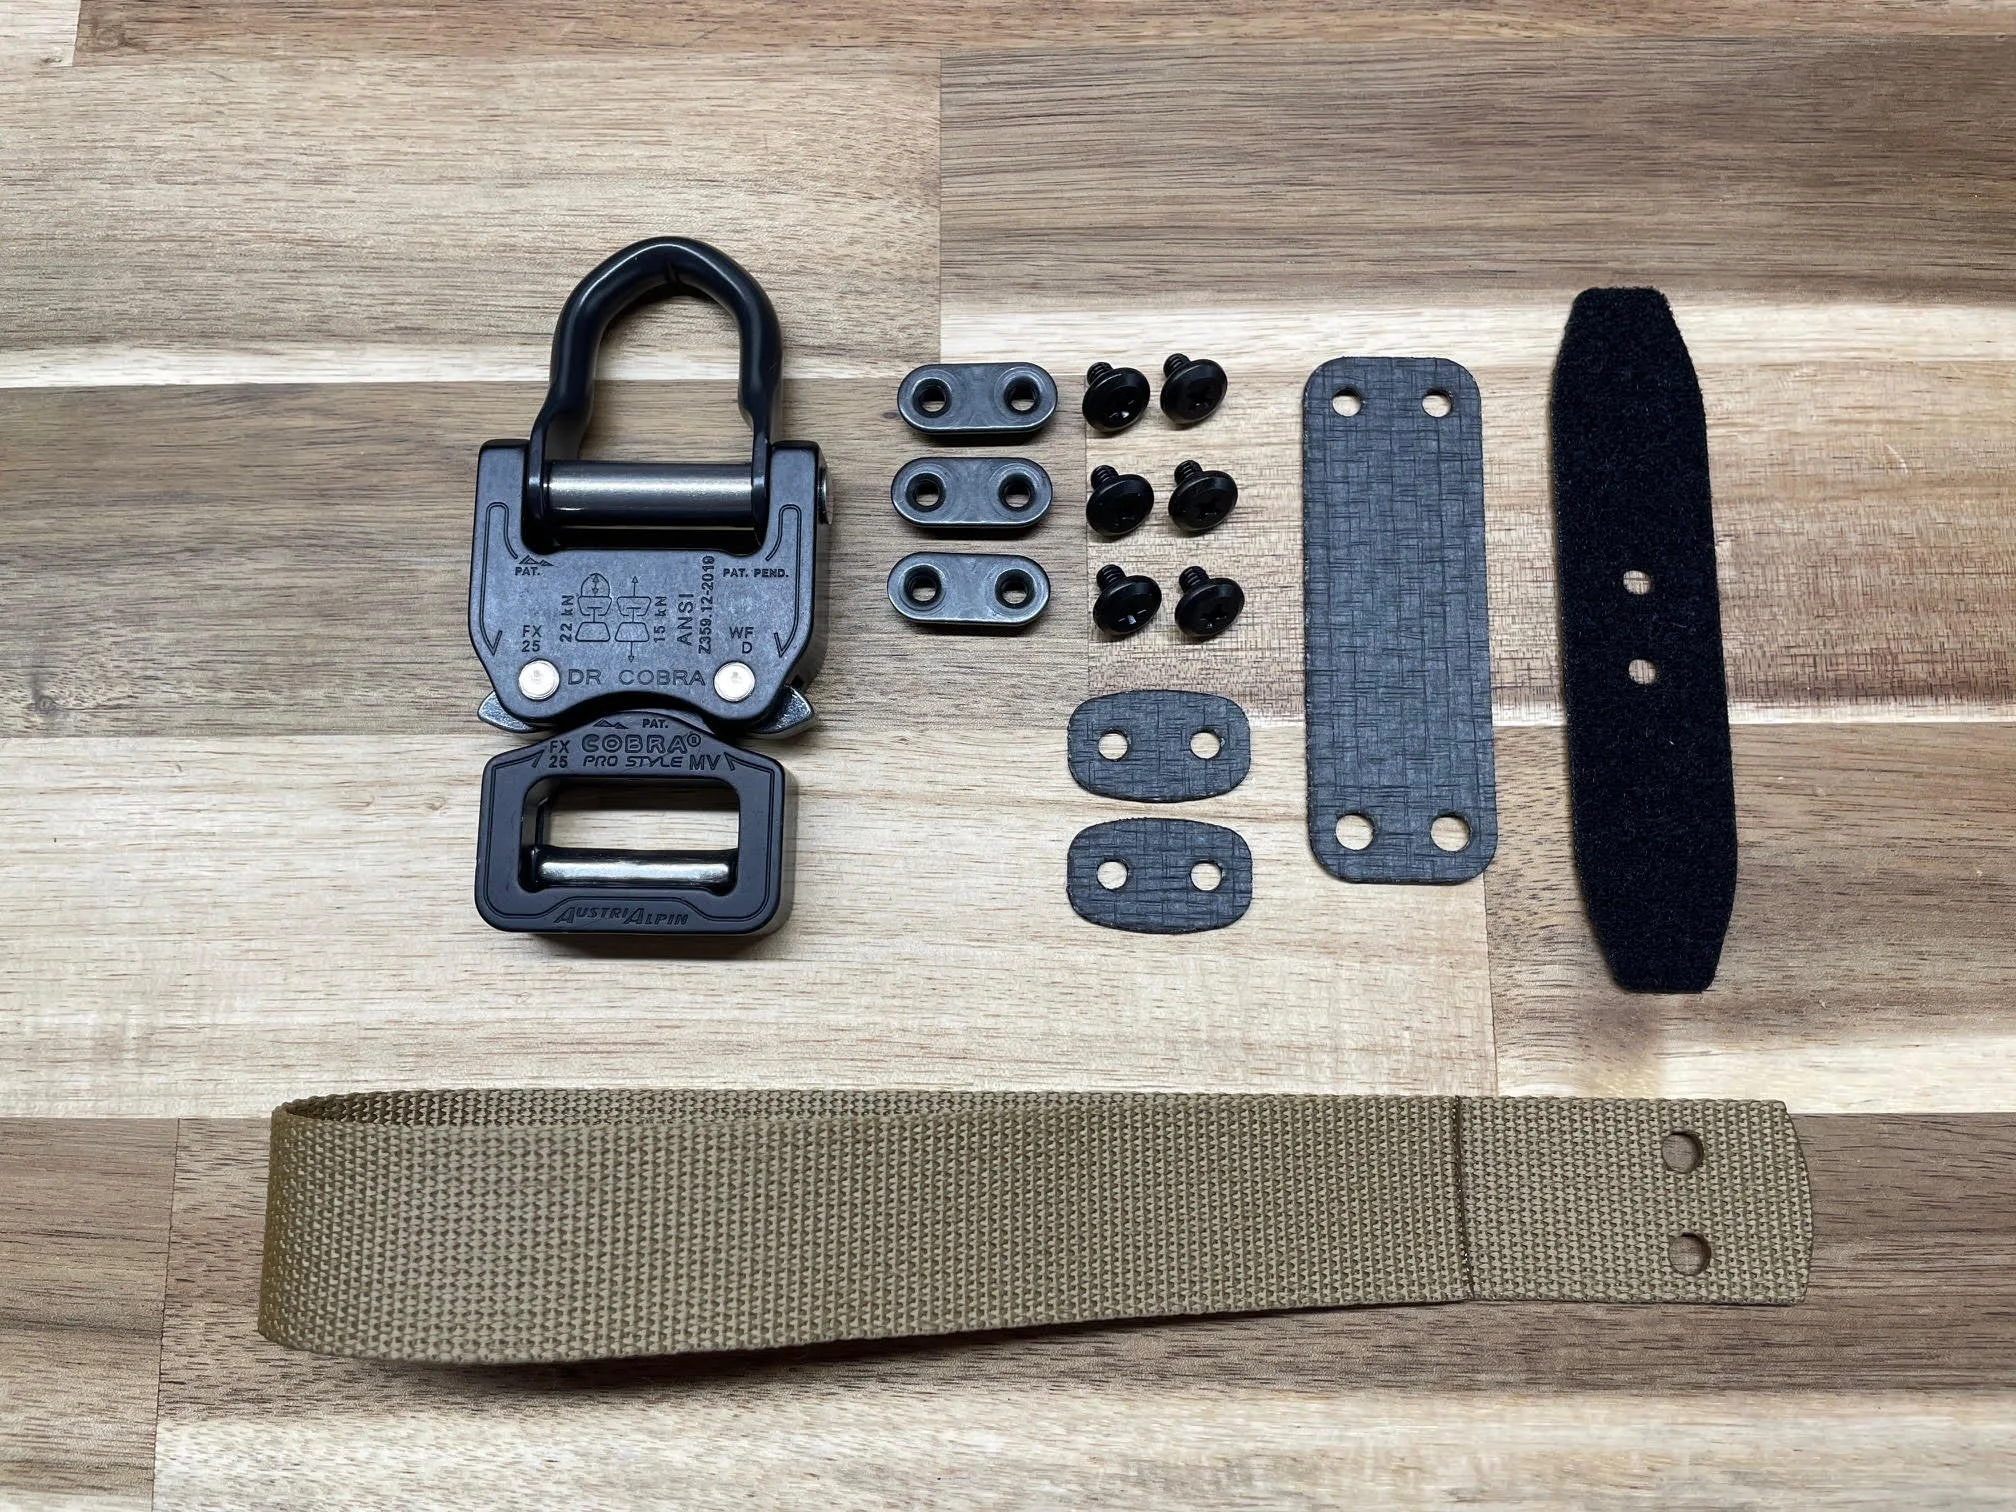
Modular Gun Belt Components
ASSEMBLY STEPS
Assembling your belt is fairly simple, but it’s critical that it is done correctly. Note that we recommend using Blue Loctite on all screws for added security, but it is entirely optional and at the discretion of the user.
Starting on one end of the belt, locate the two pairs of hardware holes. Install two of the Double Binding Posts on the the bottom side of the belt, using the outermost one, to attach the Belt Strap.
Using four of the Truss Head Screws and two of the Screw Plates, finish fastening the Belt Strap from the top side of the belt. Use the inner pair of Truss Head Screws and Screw Plate to attach the Hook & Loop Strap Keeper.
One the other end of the belt, install the female side of the Cobra Buckle, using the last Double Binding Post, Truss head Screws and the Buckle Attachment. Note that the larger holes on the Buckle Attachment are for the Double Binding Post and should be oriented so they are on the bottom side of the belt.
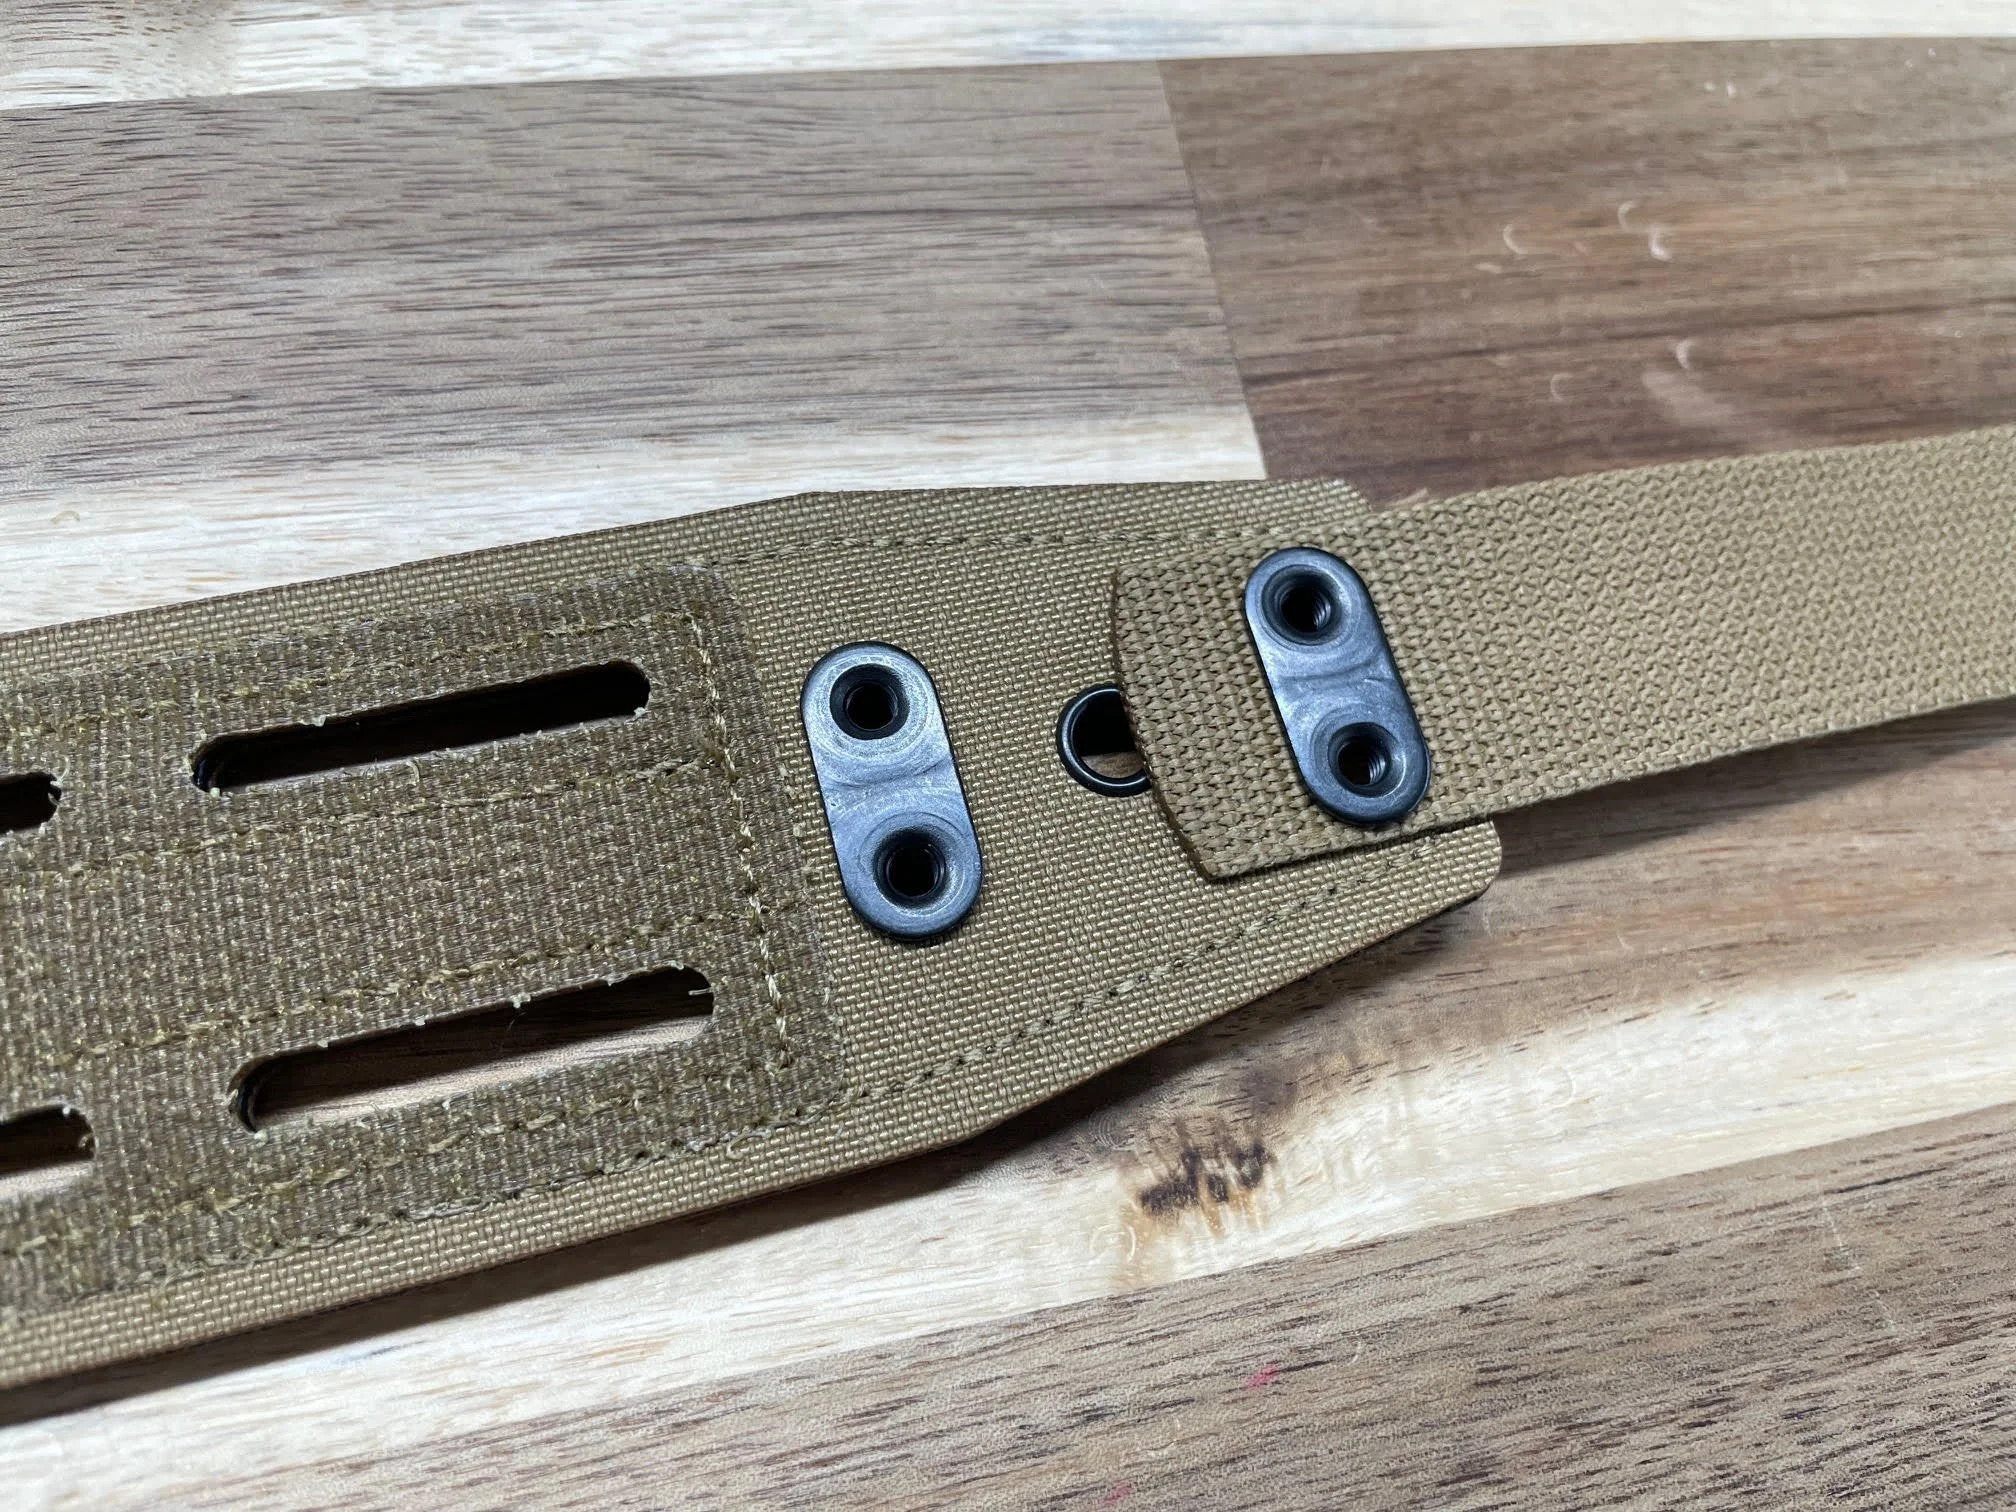
STEP 1: Double Binding Posts and Belt Strap Attachment
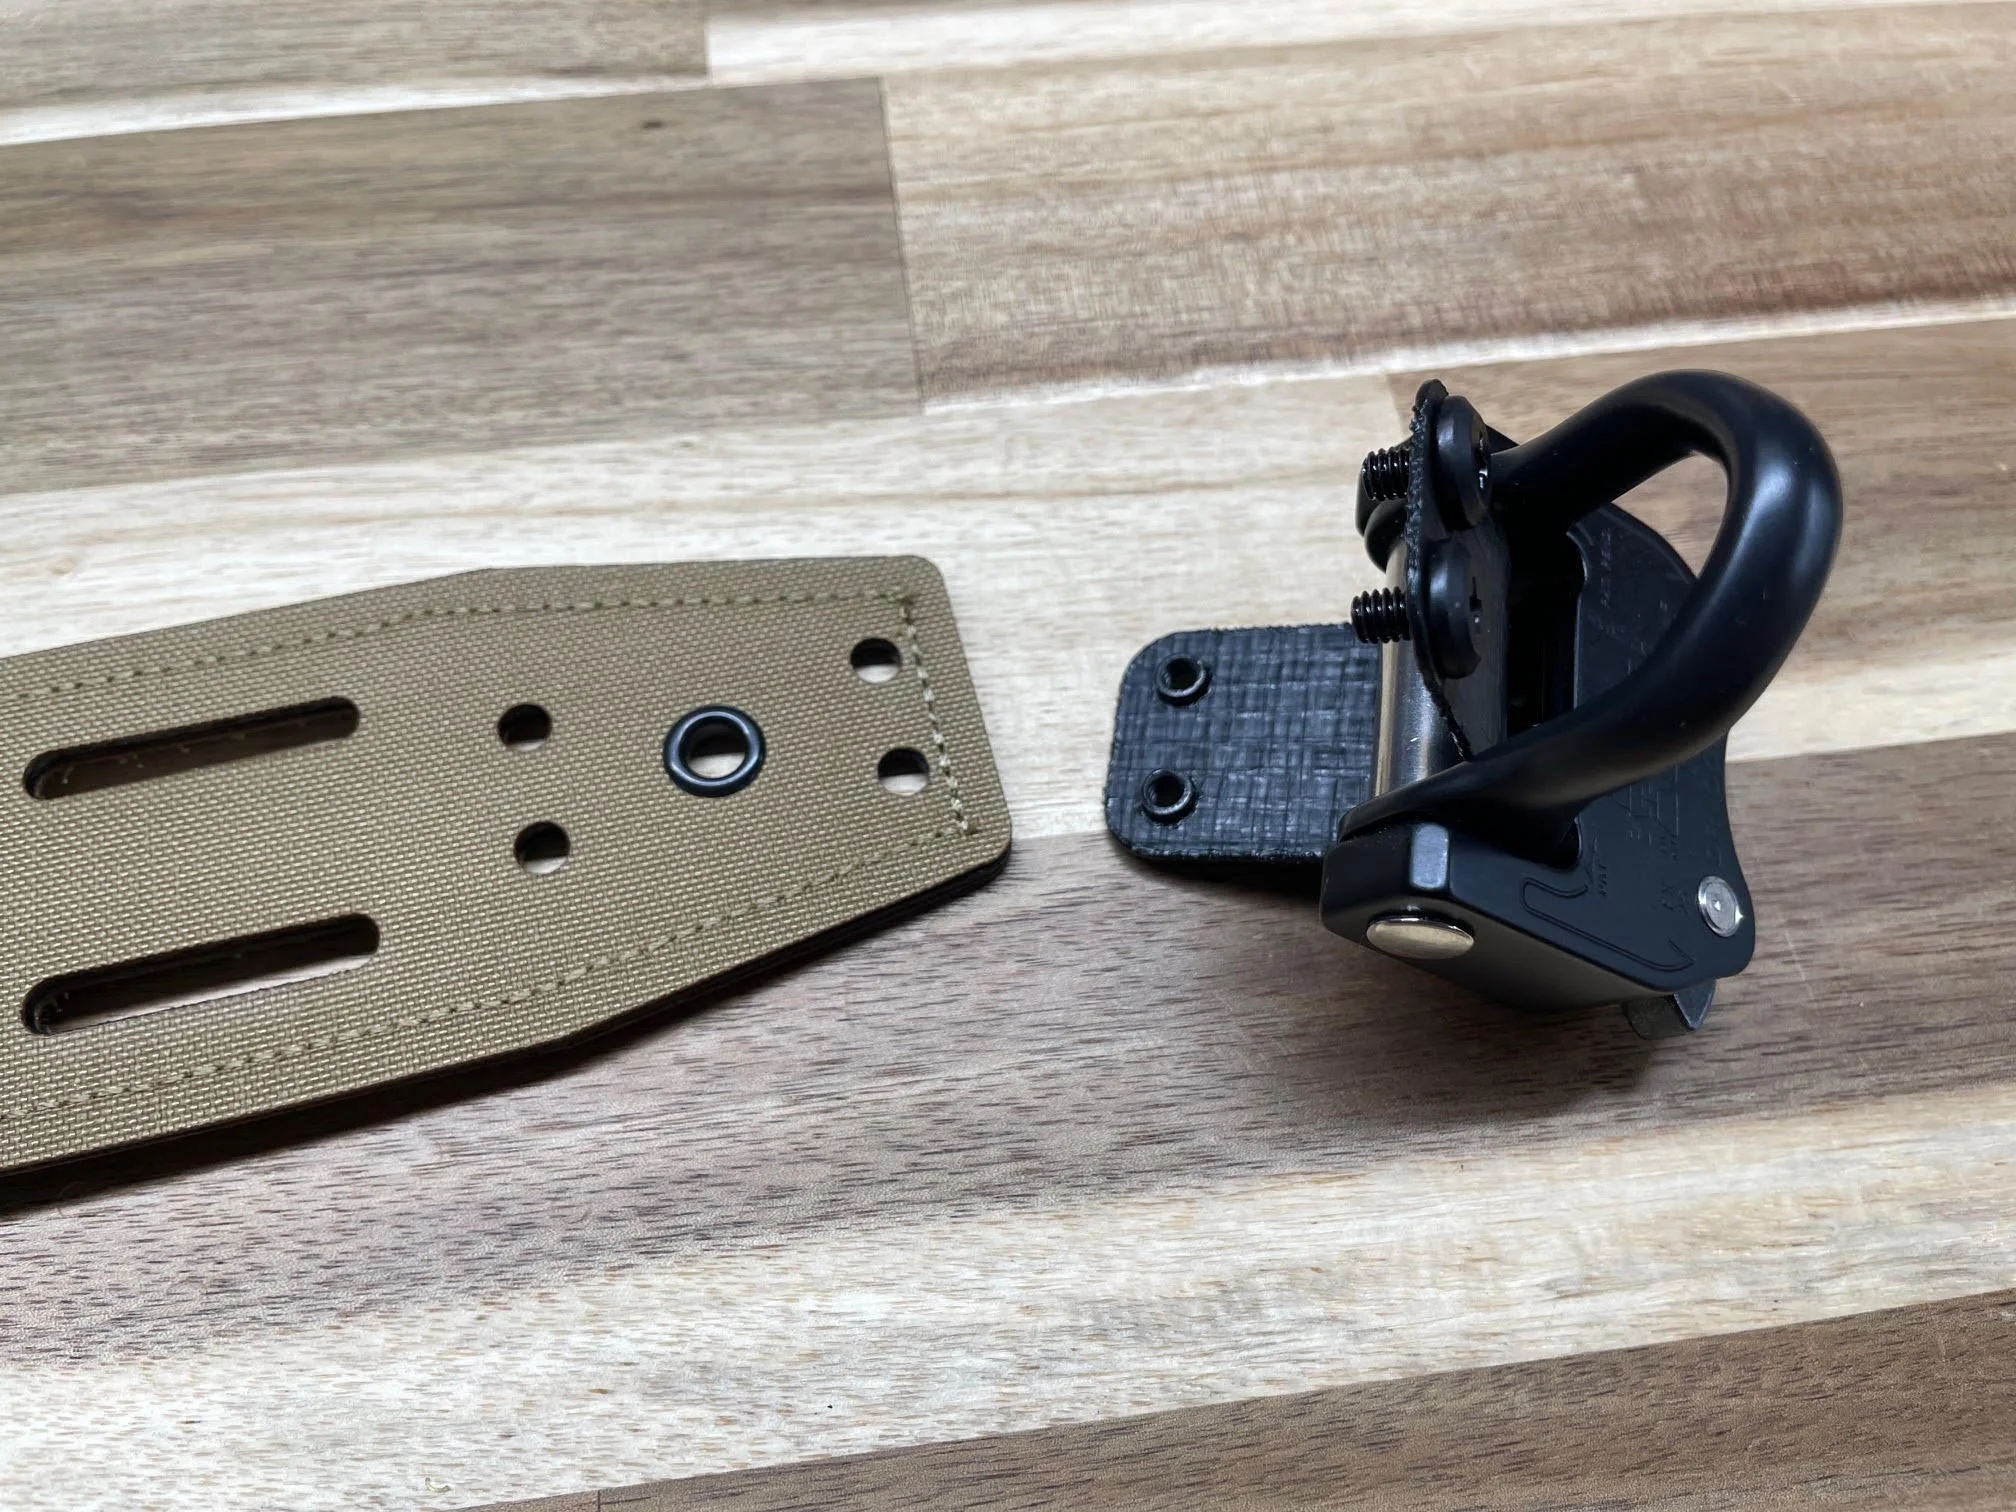
STEP 3: Truss Head Screws and Double Binding Post Installed In Buckle Attachment
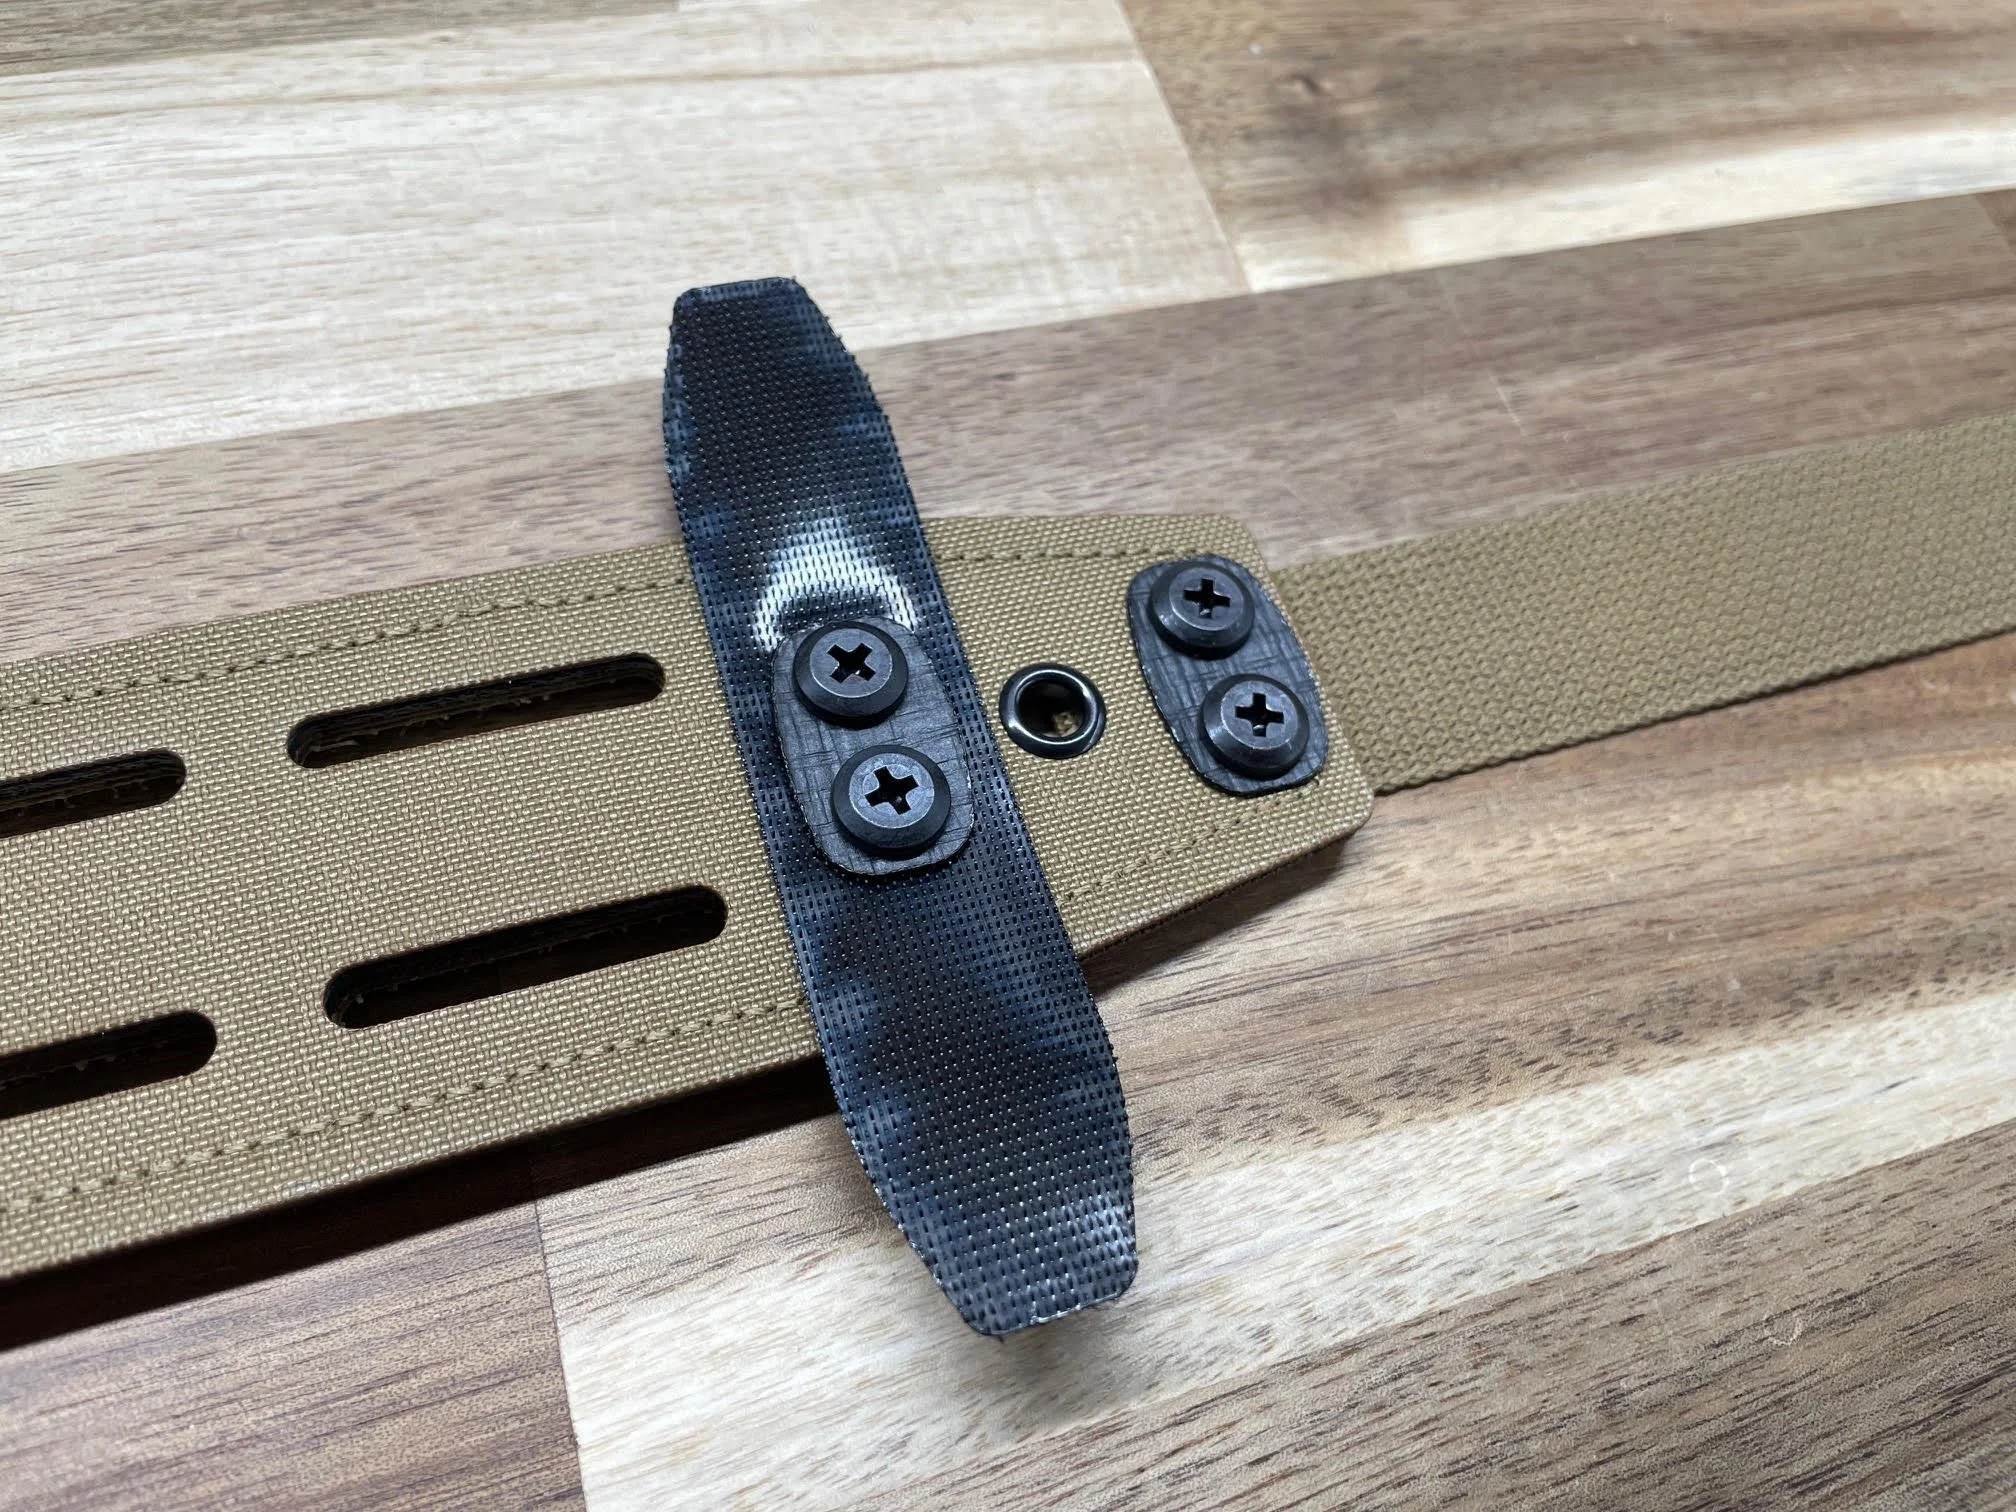
STEP 2: Truss Head Screws, Screw Plates and Hook & Loop Strap Keeper Attachment
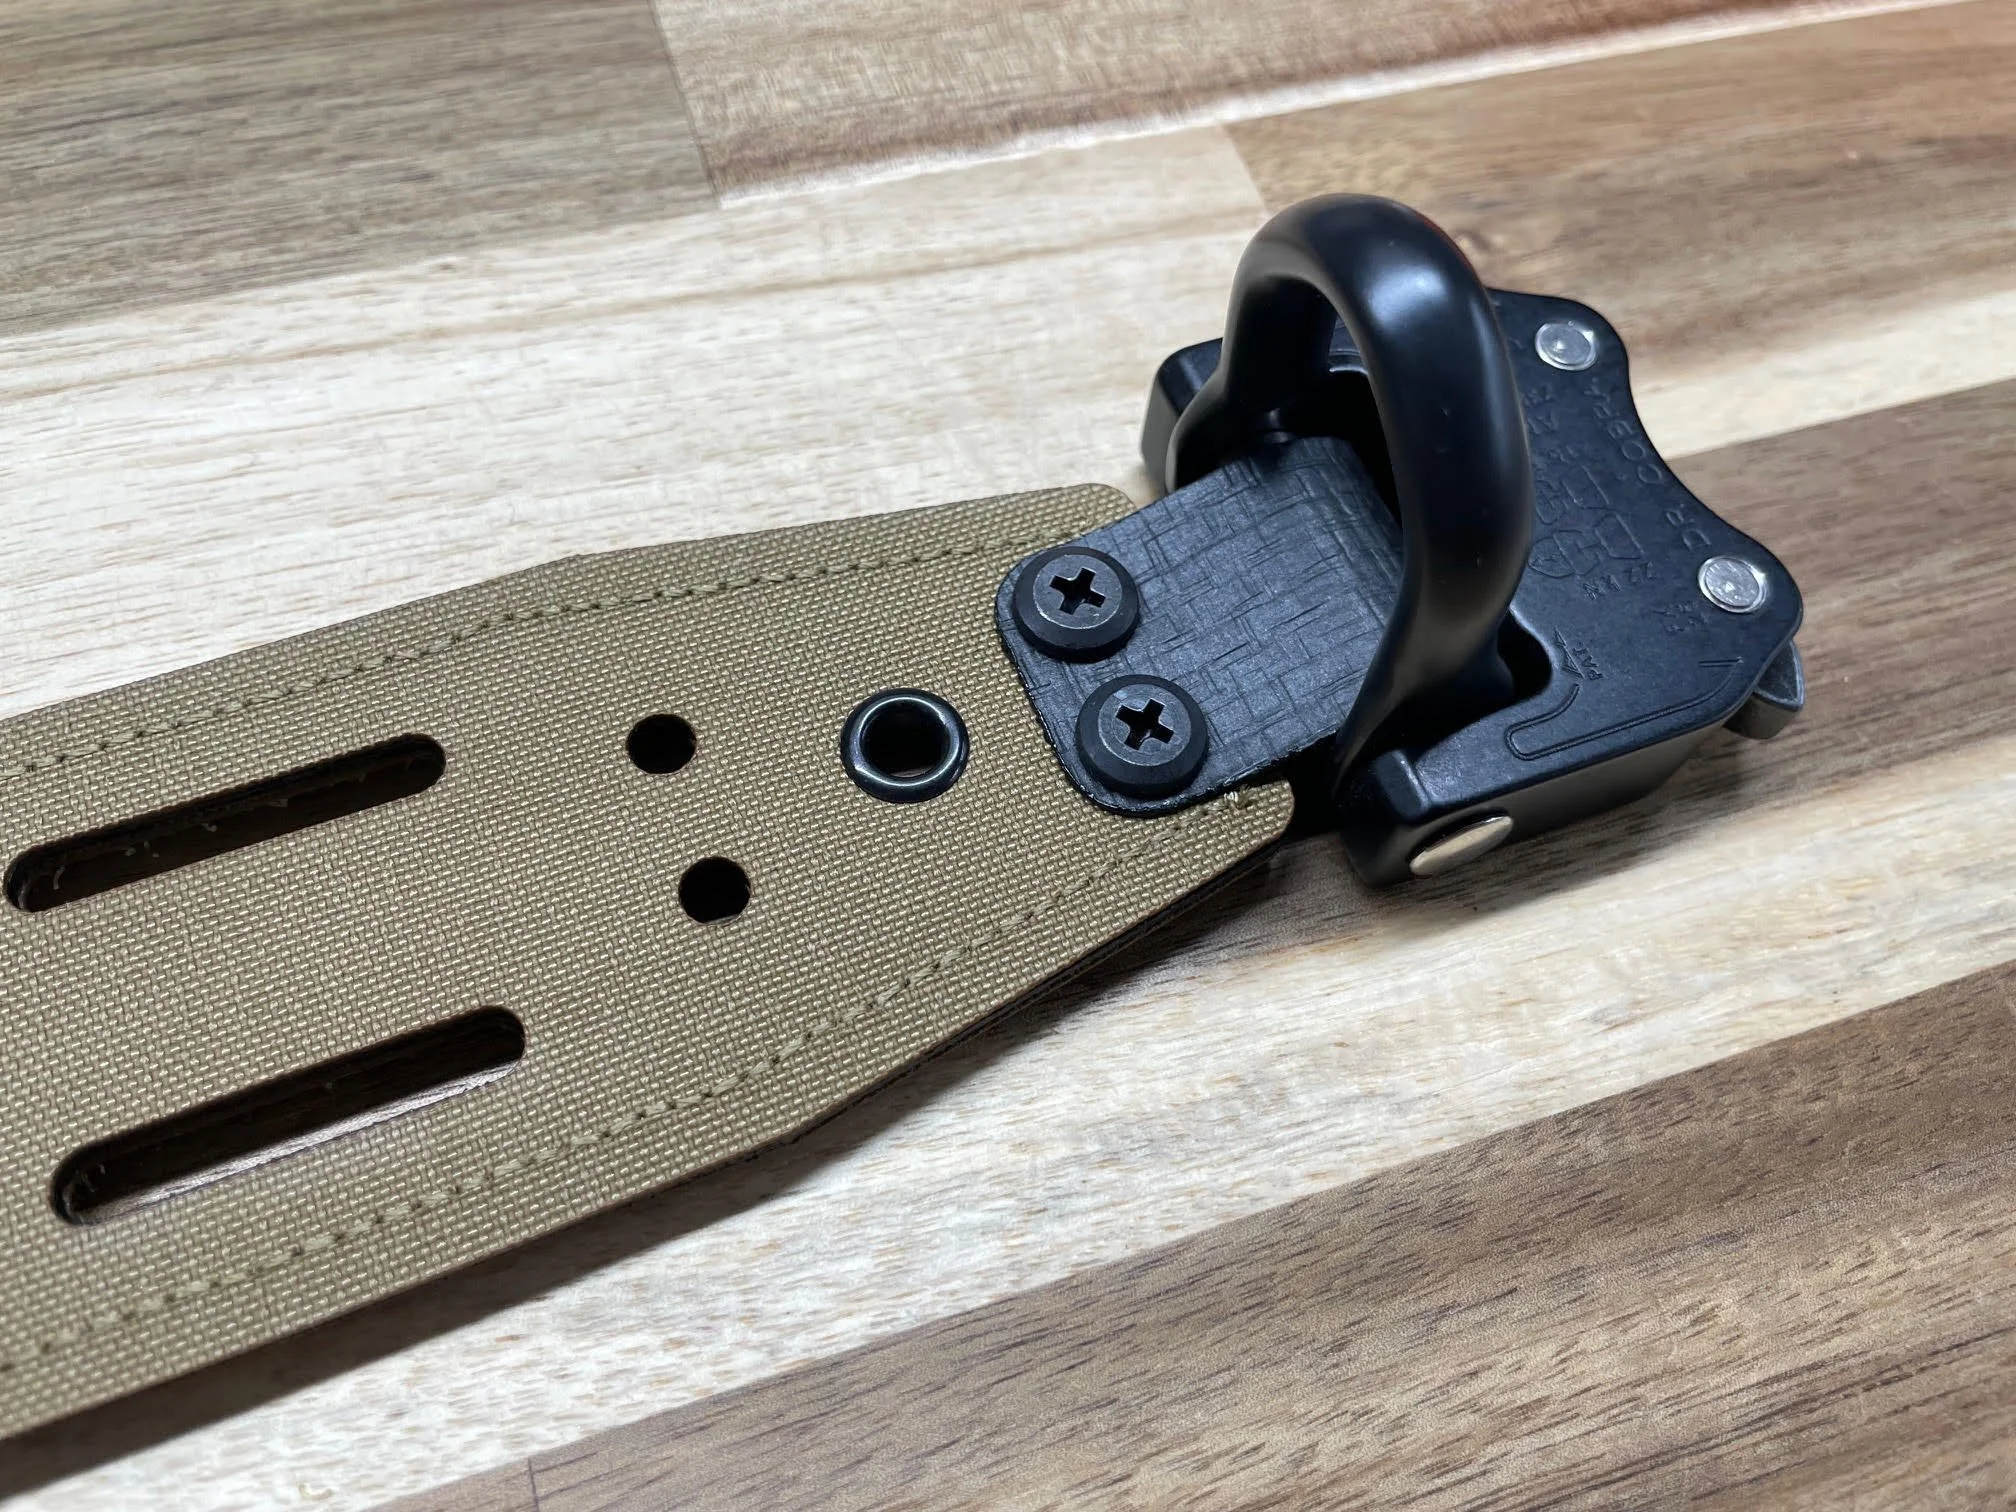
STEP 3 CON’T: Truss Head Screws Installed for Cobra Buckle